
快应用模版「今日美句」具体实现及流程分享
在先前快应用 IDE 再新增两套完善的模版,开箱即用一文中,提及了快应用 IDE 新增了一套模版,主要基于 Canvas 实现的「社交类快应用」──今日美句。本文即该模版作者的分享,讲述具体实现上的方法和流程;假如对此感兴趣,欢迎参与讨论。
一、首页日历
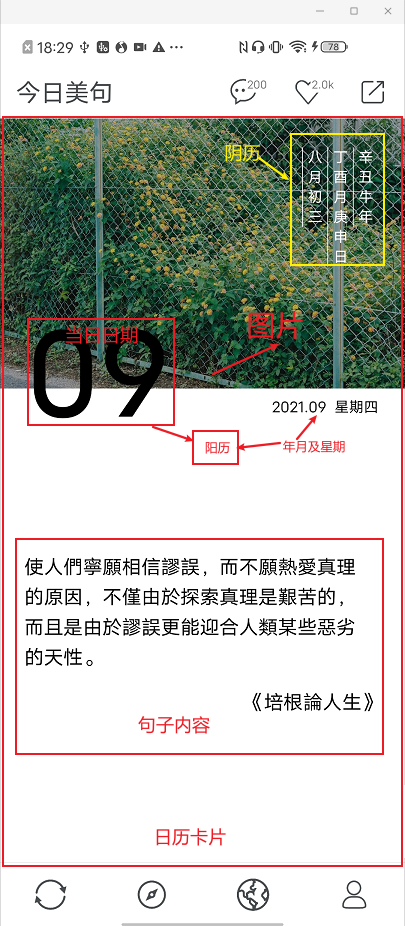
用于展示自当日,至往后一个月的日历数。每“张”日历卡片由图片、日期(阳历、阴历)及每日金句组成。
1. 左右切换
 使用
使用swiper组件可以实现左右切换当前日期的需求。
swiper组件需要固定一个高度,不能由子组件撑开。首页每“张”日历卡片需占一屏,使用下面方法获取pageHeight
- index.ux
async onInit() { // this.$app.$def.manifest.config.designWidth 可获取已配置designWidth(*只读),如未配置则使用默认designWidth const designWidth = this.$app.$def.manifest.config.designWidth || this.$app.$def.designWidth // 这里建议将默认designWidth即`750`,作为常量保存在`app.ux` const { windowHeight, windowWidth } = await $utils.deviceGetInfo() // utils.js中方法已注册到全局 this.height = (windowHeight / windowWidth) * designWidth // pageHeight } - utils.js
/** * 获取设备信息 */ function deviceGetInfo() { return new Promise((resolve, reject) => { require("@system.device").getInfo({ success: (ret) => { resolve(ret); }, }); }); } - app.ux
const $utils = require("[pathName]/utils").default;
/* @desc: 注入方法至全局 global,以便页面调用 */
const hook2global = global.__proto__ || global;
hook2global.$utils = $utils;
2. 日历卡片
 #### 2-1. 图片
2-1-1. 居中
由于展示在卡片的背景图片,不一定大小相同。此时可以设置一个固定的“box",来绘制图片区域。该模板中设置图片宽高比(sw:sh)固定为 3:2。
使用ctx.drawImage(image, sx, sy, sw, sh, dx, dy, dw, dh)进行绘制时,需要注意:
- 如果图片的实际高>= “box”的高,则需绘制的图片宽度
dw为sw,再计算出dh - 如果图片的实际高 < “box”的高,则需绘制的图片高度
dh为sh,再计算出dw
const sw = this.width;
const sh = this.width / (3 / 2);
let dw = sw;
let dh = dw / (img.width / img.height);
if (dh < sh) {
  dh = sh;
  dw = dh * (img.width / img.height);
}
2-1-2. 明暗
首页的图片明暗设置一个默认值。需要从父组件传递,详细在卡片分享-明暗中说明。
2-2. 日历
日历部分,分为阴历、阳历。
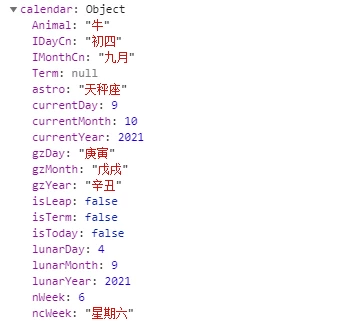
2-2-1. 日历数据
这里直接找了一个 js 库去获取到日期相关信息calendar:GitHub 地址
 ##### 2-2-2. 绘制阴历
年月日以“列”的形式排版,覆盖在图片上。根据获取到的日历数据,需要使用的信息有
const { Animal, IDayCn, IMonthCn, gzDay, gzMonth, gzYear } = calendar;
日期内容整体靠右,先定义一些需要的常量、变量。常量数值并无固定,但建议根据卡片宽度(首页日历宽度为页面宽度,即designWidth),按比例计算,提高兼容性:
const YTD_SIZE = sw / 28; // 年月及星期 文字大小
const FIRST_WORD_TOP = sh / 6.25, // 每列文字内容,首字符的上边距
  LINE_HEIGHT = YTD_SIZE + 10, // 字体大小加上下间距总和10
  LETTER_SPACING = YTD_SIZE + 10; // 字体大小加左右间距总和10
// 第一个需要绘制的日期字符的初始坐标 (dx,dy)
let dx = sw * 0.76,
  dy = FIRST_WORD_TOP;
由于文字内容以“列”的形式排版,则每绘制一个字符,dy就需要增加一个文字的lineHeight:
lunarDateHandler(ctx, str, dx, dy, lineHieght) {
    str.split('').forEach(ele => { // calendar返回的日期信息,不一定是一个字符,比如 gzMonth=“戊戌”等
      ctx.fillText(ele, dx, dy)
      dy += lineHieght
    })
    return dy // 返回新的dy用于绘制分割线的高
}
每列文本内容的左边,有一条分割线。有些分割线位于两列文字之间,给分割线定义一些左右的"margin":
const BORDER_LEFT = 10, // margin-left
      BORDER_RIGHT = 10, // margin-right
      BORDER_TOP = FIRST_WORD_TOP - YTD_SIZE, // 每列文字内容的左边框,左右边距及上边距
因为 canvas 绘制文字时,并不存在“行高”的概念,在绘制每列最后一个字符时,实际上只需要再增加一个字符下边距的值(即 (lineHieght-YTD_SIZE)/2,返回的就是实际需要的线条高度,但是我们并没有在lunarDateHandler方法中处理,直接增加了一个lineHeight
this.lunarDateBorderLeft(
      ctx,
      dx - BORDER_RIGHT,
      BORDER_TOP,
      dx - BORDER_RIGHT,
      dy - YTD_SIZE  // 这里需要减去一个字符高度,视觉上使文字上边距和线条上边距对齐,达到字符拥有“行高”的效果
    )
/**
 * 绘制线条的方法
 */
lunarDateBorderLeft(ctx, x0, y0, x1, y1) {
    ctx.moveTo(x0, y0)
    ctx.lineTo(x1, y1)
    ctx.stroke()
}
2-2-3. 绘制阳历
年月及星期:
简单定义一个(x,y),使得文字内容位于右下角即可,建议根据卡片宽度,按比例来计算。
当日日期:
简单定义一个(x,y),使得文字内容位于左下角即可,建议根据卡片宽度,按比例来计算。
2-2-4. 每日金句
下方的文本内容,上下居中且换行展示。
根据卡片的高度(由于首页占一屏,即pageHeight)减去上方图片及日期的高度,计算出剩余的、可用于展示文字内容的高度contentHeight
const contentHeight = this.height - sh;
定义固定文字内容左边距及每行宽度
const lineWidth = $utils.lineWidthHandler(w); // 固定每行宽度
const default_drawX = w * 0.06; // 固定一个左边距
2-2-5. 开始绘制
- 绘制前:
// 获取文字内容总宽度
const txtToatalWidth = ctx.measureText(content).width; // 这个宽度和文字大小及文字内容的长度有关
let drawTxt = ""; // 当前绘制的内容
let drawLine = 1; // 第几行开始绘制
let drawIndex = 0; // 当前绘制内容的索引
-
绘制方法
需要绘制内容的宽度ctx.measureText(drawTxt).width<每行宽度lineWidth,则直接绘制:if (txtToatalWidth <= lineWidth) { ctx.fillText(content, drawX, drawY); }需要绘制内容的宽度
ctx.measureText(drawTxt).width>每行宽度lineWidth:for (let i = 0; i < content.length; i++) { drawTxt += content[i] if (ctx.measureText(drawTxt).width >= lineWidth) { if (drawLine >= 10) { // 绘制的行数大于10时,不再进行绘制,以省略号的形式展示 ctx.fillText(content.substring(drawIndex, i) + '..', drawX, drawY) break } else { ctx.fillText(content.substring(drawIndex, i + 1), drawX, drawY) drawIndex = i + 1 drawLine += 1 drawY += lineHeight drawTxt = '' } } else { // 内容绘制完毕,但是剩下的内容宽度不到lineWidth if (i === content.length - 1) { const lastConten = content.substring(drawIndex) ctx.fillText(lastConten, drawX, drawY) } } } } -
封装方法
此时可以将文本内容换行方法封装,命名为textWrap:function textWrap(ctx,content,lineWidth,lineHeight,drawX,drawY){ if (txtToatalWidth <= lineWidth) { // 需要绘制内容的宽度`ctx.measureText(drawTxt).width`<每行宽度`lineWidth`,则直接绘制: ctx.fillText(content, drawX, drawY) } else{ // 需要绘制内容的宽度`ctx.measureText(drawTxt).width`>每行宽度`lineWidth`: ... } }
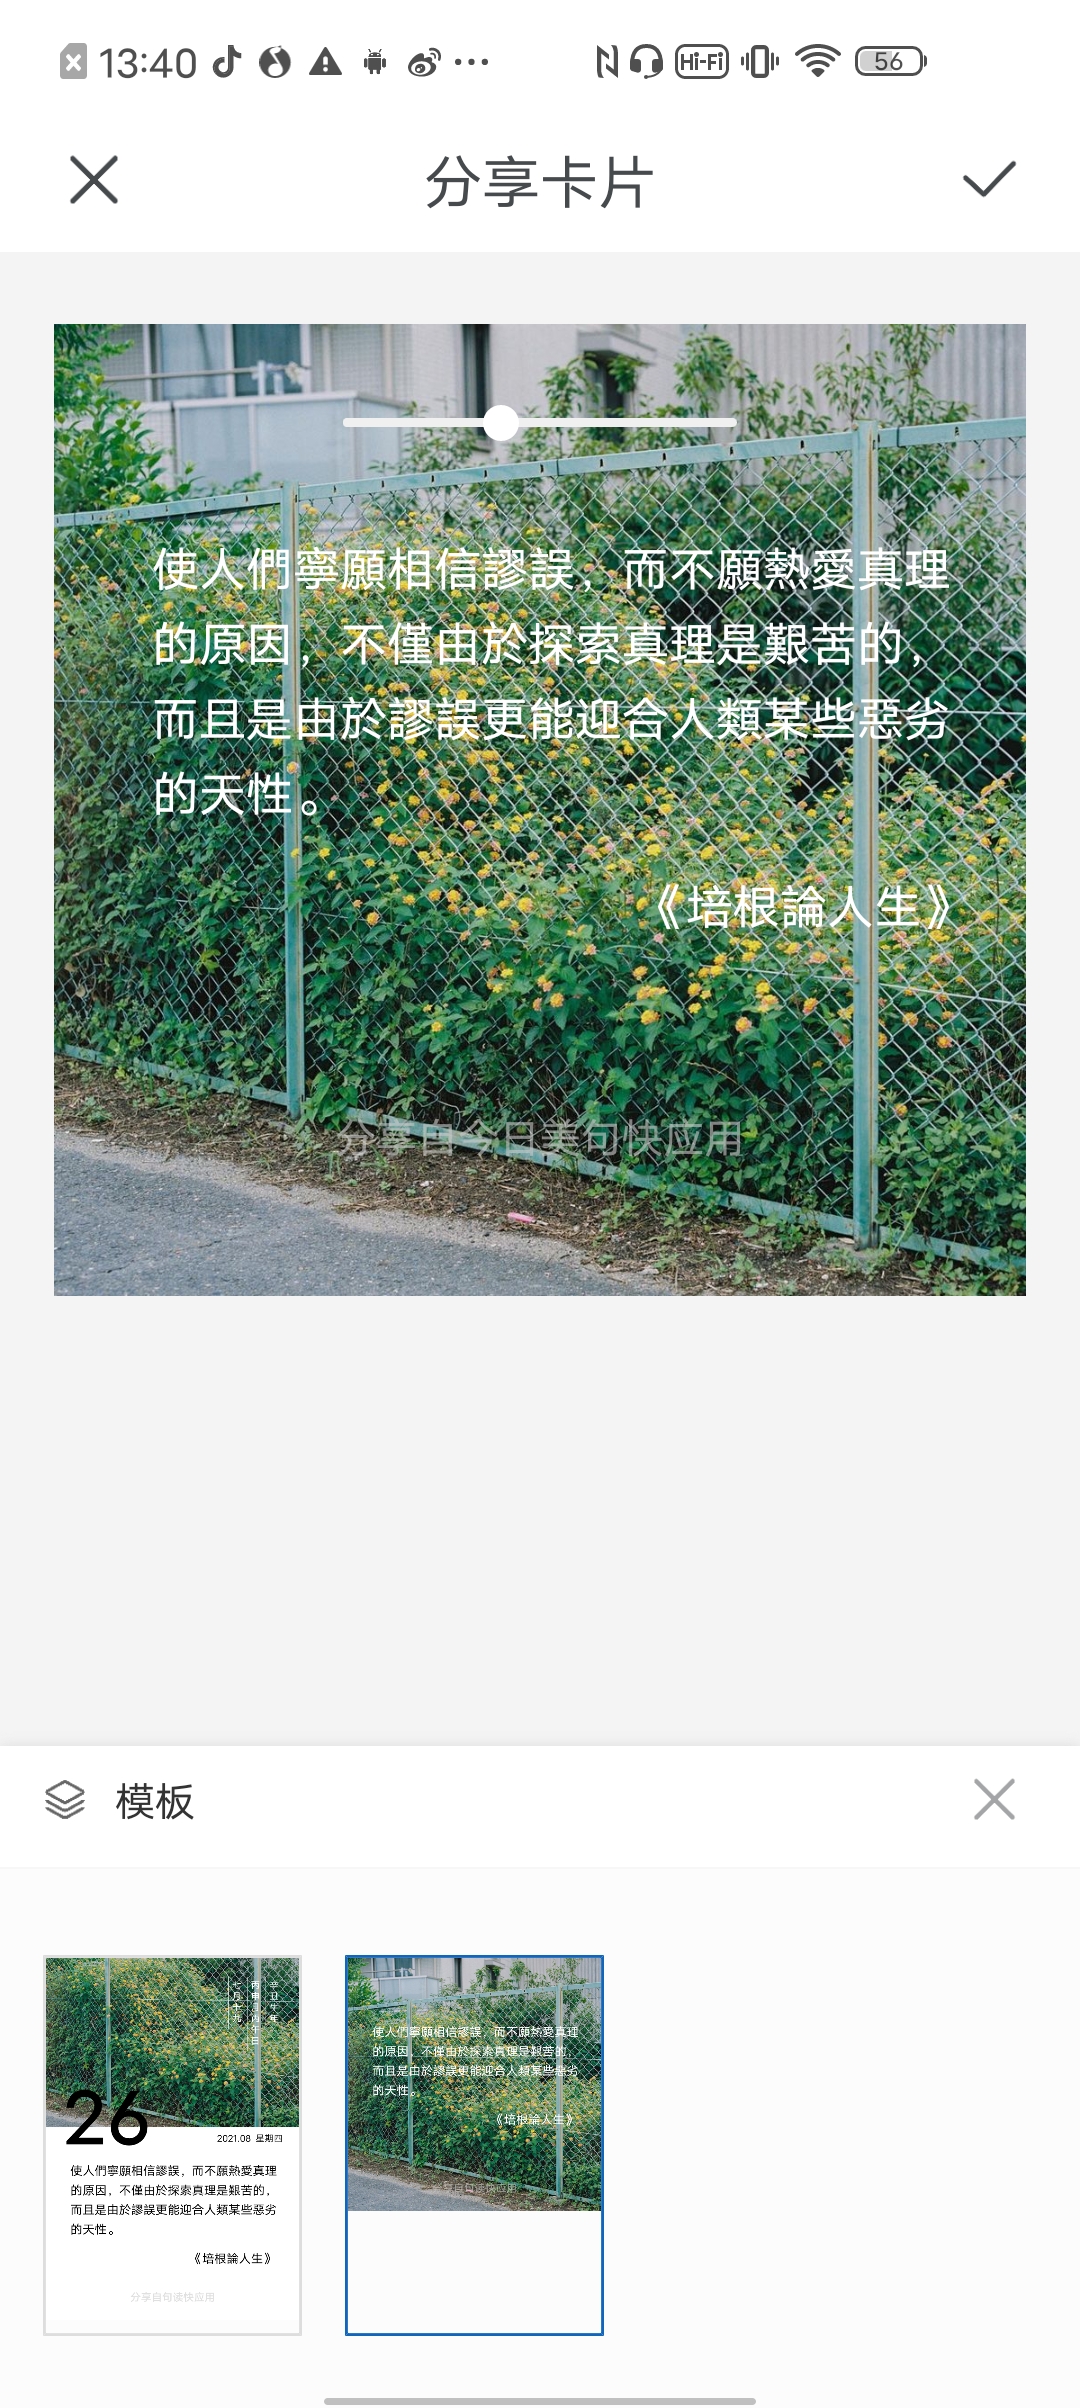
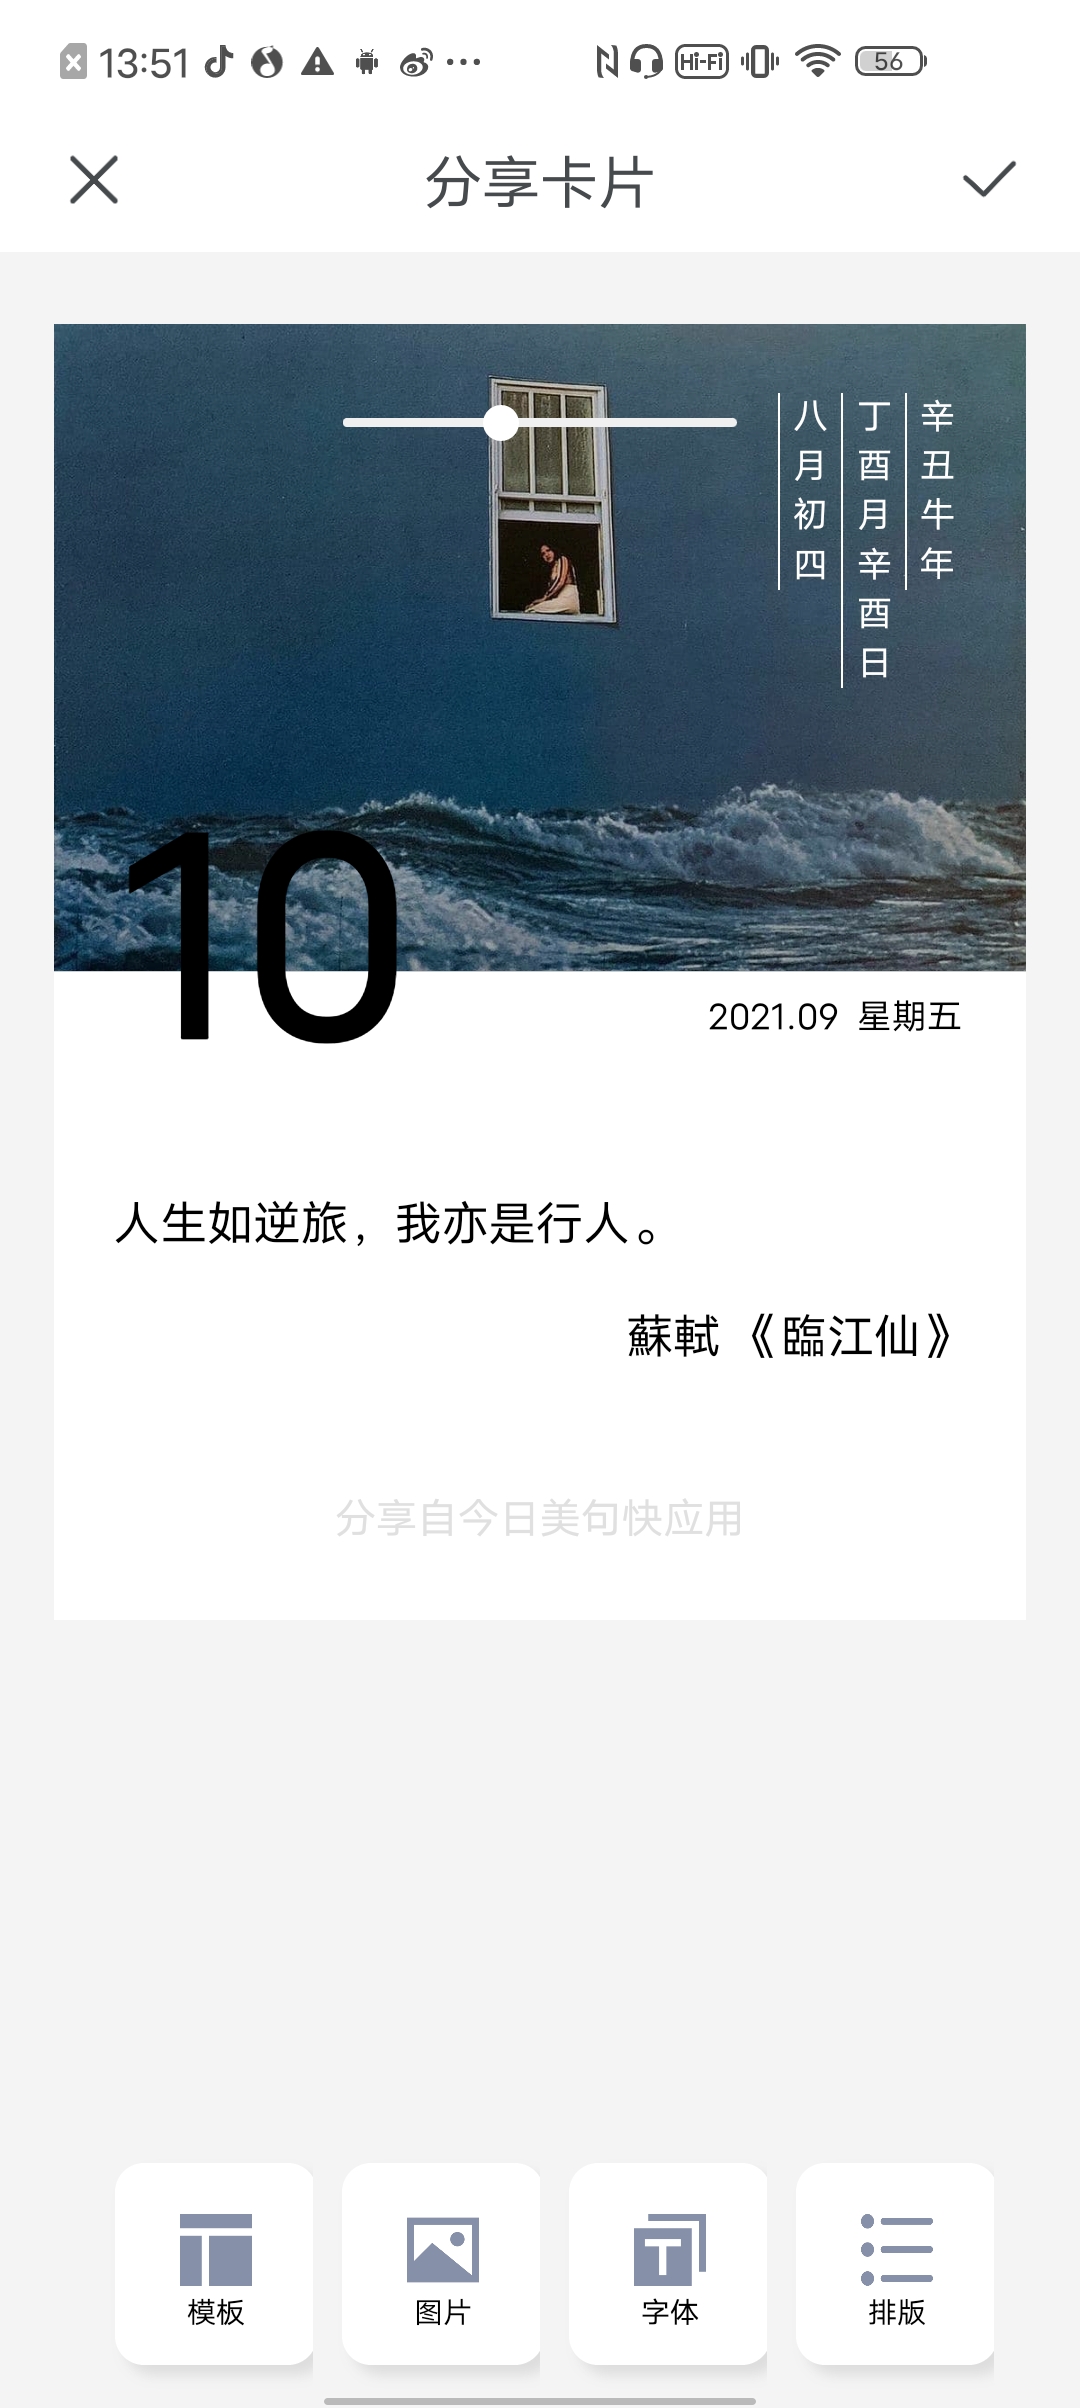
二、卡片分享
将需要分享的内容(金句、诗歌/词),进行相应编辑后,生成图片保存到相册,并分享到各平台。
1. 分享内容
1-1. 金句模板 (日历形式)
 ##### 1-1-1. 固定卡片宽度
定义一个固定的宽度,建议根据designWidth,按比例计算
let designWidth =
  this.$app.$def.manifest.config.designWidth || this.$app.$def.designWidth;
this.width = designWidth * 0.9;
1-1-2. 计算卡片高度
this.fontSize = this.width / 21; // 随意定义一个字体大小
this.lineHeight = this.width / 21 + 20; // 根据字体大小增加“上下间距”,定义“行高”
const lineWidth = $utils.lineWidthHandler(this.width); // 固定每行宽度
this.lines = (this.info.content.length * this.fontSize) / lineWidth; // 计算总行数
const otherLines = this.lineHeight * 5; // slogan及source预留高度
const padding = this.width / 7.5; // 文本内容上下padding
// 图片宽高比3:2
const imgHeight = this.width / 1.5;
// 卡片最小高度
const minHeight = imgHeight * 2;
const padding = this.lineHeight * 4;
this.height = this.lines * this.lineHeight + padding + imgHeight + otherLines;
this.height = this.height < minHeight ? minHeight : this.height;
绘制步骤及方法同日历卡片。此时,可以将日历“卡片”下方内容的绘制方法封装,只需要传递卡片的宽、高,文字大小、行高和所需绘制内容等关键信息,即可绘制不同 size的“卡片”:
function drawContent(ctx, info, w, h, fontSize, lineHeight, marginTop, slogan) {
  ctx.fillStyle = "#000000";
  const lineWidth = $utils.lineWidthHandler(w); // 固定每行宽度
  const default_drawX = w * 0.06; // 固定一个左边距
  const content = info.content;
  let title = info.title || "";
  let author = info.author || "";
  const source = `${author} ${title}`;

  ctx.fillStyle = color;
  ctx.font = `${fontSize}px`;

  const lineNum = Math.ceil(lineWidth / fontSize);
  const lines = Math.ceil(content.length / lineNum);
  let drawX = default_drawX;
  let sourceLeft = w - ctx.measureText(source).width - drawX;
  let drawY = (h - lines * lineHeight) / 2 + marginTop;
  // 绘制引用出处(作者、标题)
  if (!!title || !!author) {
    drawY = (h - lines * lineHeight + lineHeight) / 2 + marginTop - lineHeight;
    let sourceTop = lines * lineHeight + drawY + lineHeight / 2;
    ctx.fillText(source, sourceLeft, sourceTop);
  }
  // 绘制句子
  textWrap(ctx, content, lineWidth, lineHeight, drawX, drawY);
  // 绘制分享来源
  if (slogan !== "") {
    slogan = `分享自${slogan}快应用`;
    const sloganSize = $utils.minFontSize(w); // 定义任意合适的字体大小,建议根据designWidth按比例计算
    ctx.fillStyle = "#cccccc";
    ctx.globalAlpha = 0.6;
    ctx.font = `${sloganSize}px`;
    let sloganMarginLeft = (w - ctx.measureText(slogan).width) / 2; // 居中
    const sloganMarginBottom = 50;
    let sloganMarginTop = h - sloganMarginBottom + marginTop;
    ctx.fillText(slogan, sloganMarginLeft, sloganMarginTop);
    ctx.globalAlpha = 1;
  }
  return lines;
}
1-2. 金句模板(图文形式)
固定为正方形,背景填充为纯图片,文本内容上下左右居中于图片上方
 ##### 1-2-1. 绘制图片
图片也需要根据实际宽高进行居中展示,参考日历卡片-图片的绘制方法
1-2-2. 绘制内容
由于是直接绘制在图片上方,此时 marginTop 为 0,直接调用drawContent方法:
drawContent(
  ctx,
  info,
  w,
  h, // h = w
  fontSize,
  lineHeight,
  (marginTop = 0)
);
1-3. 绘制金句卡片
关于明暗度的绘制,实际上是添加了一层黑色的"蒙版",通过父子组件之间传值,$watch监听蒙版透明度的变化,实现效果
drawCard(
    idx,
    info,
    font = this.font,
    fontSize = this.fontSize,
    hasTitle = this.hasTitle,
    hasAuthor = this.hasAuthor,
    lineHeight = this.lineHeight,
    alignType = this.alignType
  ) {
    const canvas = this.$element(`canvas${idx}`) //获取 canvas 组件
    const ctx = canvas.getContext('2d') //获取 canvas 绘图上下文
    ctx.clearRect(0, 0, this.width, this.height)
    ctx.fillStyle = '#ffffff'
    ctx.fillRect(0, 0, this.width, this.height)
    // 绘制背景图
    const img = new Image()
    img.src = info.data.image
    img.onload = () => {
      // 固定背景图大小 w: h = 3: 2
      const sw = this.width
      const sh = this.width / (3 / 2)
      let dw = sw
      let dh = dw / (img.width / img.height)
      if (dh < sh) {
        dh = sh
        dw = dh * (img.width / img.height)
      }
      ctx.drawImage(
        img,
        0,
        -(dh - sh) / 2,
        img.width,
        img.height,
        0,
        -(dh - sh),
        dw,
        dh
      )
      // 明暗度
      ctx.globalAlpha = this.alpha
      ctx.fillStyle = '#000000'
      ctx.fillRect(0, 0, sw, sh)
      // 文字部分
      ctx.globalAlpha = 1 // 还原默认透明度 1
      // 日期部分 阴历
      this.drawLunarDate(ctx, info.calendar, sw, sh)
      // 日期部分 阳历
      const DATE_SIZE = sw / 3.5 // 当日 文字大小
      const marginTop = sh + DATE_SIZE * 0.2
      this.drawNewDate(ctx, info.calendar, sw, sh, DATE_SIZE, marginTop)
      // 内容
      const contentHeight = this.height - sh
      this.lines = drawContent(
        ctx,
        info.data,
        sw,
        contentHeight,
        fontSize,
        '#000000',
        this.slogan,
        marginTop,
        hasTitle,
        hasAuthor,
        font,
        lineHeight
      )
    }
    img.onerror = () => {
      console.log('图片加载失败')
    }
  }
1-4. 诗词/诗歌模板
诗词/诗歌的换行比较特殊,例如:
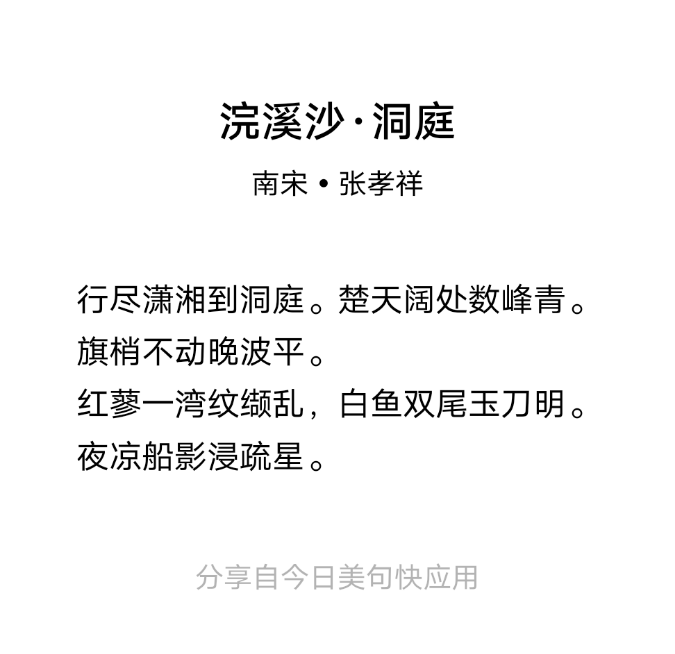

这样的文本内容,不能单纯用”。”或者“ ”(空格)区分。
1-4-1. 数据处理
因此从数据着手,将需要换行的句子,用**“/”隔开**:
`“行尽潇湘到洞庭。楚天阔处数峰青。旗梢不动晚波平。/红蓼一湾纹缬乱,白鱼双尾玉刀明。夜凉船影浸疏星。”`

`“等待也许终于有人记得端来/她那甜甜的 甜甜的 甜点”`
再将其处理为数组:
let arr = this.info.content.split("/");
这样,我们可以得到一个数组:
 ##### 1-4-2. 新的数组
可以发现,上图中,诗词(左图)的每行,并不是按照数组中每个元素去绘制的,而是将每个数组元素中的内容绘制了两行。
- 随意设置一个合适的字体大小及行高:
this.fontSize = $utils.setFontSize(this.width); this.lineHeight = $utils.setLineHeight(this.fontSize); - 处理数组的方法:
getContentArr(){ const lineWidth = $utils.lineWidthHandler(this.width) // 固定每行宽度 let arr = this.info.content.split('/') let newArr = [] for (let i = 0; i < arr.length; i++) { let totalWords = arr[i].length // 需要绘制的文本总字数 let countWordOfALine = Math.floor(lineWidth / this.fontSize) // 限制一行绘制的字数 if (totalWords > countWordOfALine) { // 超出一行所限的文本内容 const aliquot = Math.floor(totalWords / countWordOfALine) const remainder = arr[i].substring(aliquot * countWordOfALine) let start = 0 let end = countWordOfALine arr.splice(i, 0) for (let j = 0; j < aliquot; j++) { start = countWordOfALine * j end = start + countWordOfALine let str = arr[i].substring(start, end) // 绘制aliquot次countWordOfALine长度的文本内容 newArr.push(str) } newArr.push(remainder) // 剩余不够绘制一次countWordOfALine长度的文本内容 } else { newArr.push(arr[i]) // 未超出一行所限的文本内容 } } return newArr } - 然后,可以得到一个新的数组:
 ##### 1-4-3. 绘制内容的总行数
根据新数组,我们可以得到绘制的总行数:
let contentArr = this.getContentArr();
this.lines = contentArr.length;
1-4-4. 绘制内容中的固定高度
我们还需要固定出引用来源(标题、作者和时代)、slogan 的高度,以及给卡片一个上下的padding:
const titleSize = $utils.setFontSize(this.width, 16);
const sourceSize = $utils.minFontSize(this.width);
const cardTop = $utils.setFontSize(this.width, 5);
const cardBottom = cardTop;
const sourceTop = $utils.setFontSize(this.width, 44);
const sourceBottom = $utils.setFontSize(this.width, 18);
1-4-5. 计算卡片高度
有了上述信息,我们可以获得卡片的高度:
this.height =
  titleSize +
  sourceSize +
  this.lines * this.lineHeight +
  cardTop +
  cardBottom +
  sourceTop +
  sourceBottom +
  sloganSize;
1-4-6. 绘制内容对齐方式
- 诗歌:
文本内容左对齐
绘制“日历卡片”的固定左边距的方法,同样适用“诗歌卡片”const default_drawX = w * 0.06; // 固定一个左边距 let dx = default_drawX; - 诗词:
文本内容上下左右居中对齐
不适用于上述固定左边距的方法,需要对drawX再次进行计算if (info.dynasty !== "现代") { // 可以根据朝代去区分 let lenArr = []; arr.forEach((ele) => lenArr.push(ele.length)); let maxCount = Math.max(...lenArr); // 取数组元素中最长的内容,计算出其宽度 let temp = arr.filter((ele) => ele.length === maxCount); dx = (w - ctx.measureText(temp[0]).width) / 2; // 得到可以使文本内容整体居中的左边距 }
1-4-7. 封装方法
接下来可以封装绘制诗词/诗歌卡片,主体文本内容的方法:
drawContent(
    ctx,
    info,
    w,
    h,
    dy,
    arr,
    font,
    fontSize,
    lineHeight
  ) {
    const lineWidth = $utils.lineWidthHandler(w) // 固定每行宽度
    const default_drawX = w * 0.06 // 固定一个左边距
    let dx = default_drawX
    dy += lineHeight
    ctx.fillStyle = color
    ctx.globalAlpha = 1
    ctx.font = `${fontSize}px normal ${font}`
    if (info.dynasty !== '现代') {
      let lenArr = []
      arr.forEach(ele => lenArr.push(ele.length))
      let maxCount = Math.max(...lenArr)
      let temp = arr.filter(ele => ele.length === maxCount)
      dx = (w - ctx.measureText(temp[0]).width) / 2
    }
    for (let i = 0; i < arr.length; i++) {
      const element = arr[i]
      ctx.fillText(arr[i], dx, dy)
      if (i !== arr.length - 1) dy += lineHeight
    }
    return dy
  }
1-5. 绘制诗词/诗歌卡片
drawCard(
    info,
    font,
    fontSize,
    lineHeight
  ) {
    const canvas = this.$element('canvas') //获取 canvas 组件
    const ctx = canvas.getContext('2d') //获取 canvas 绘图上下文
    let w = this.width,
      h = this.height
    ctx.clearRect(0, 0, w, h)
    ctx.fillStyle = '#ffffff'
    ctx.fillRect(0, 0, w, h)
    // 标题
    let {
      contentArr,
      titleSize,
      sourceSize,
      cardTop,
      cardBottom,
      sourceTop,
      sourceBottom
    } = this.$parent().cardSizeHandler()
    const source = `${info.dynasty} • ${info.author}`
    ctx.globalAlpha = 1
    ctx.fillStyle = '#ffffff'
    ctx.fillRect(0, 0, w, h)
    ctx.fillStyle = '#000000'
    // 标题
    ctx.font = `${titleSize}px bold sans-serif`
    let dx = (w - ctx.measureText(info.title).width) / 2
    let dy = cardTop
    ctx.fillText(info.title, dx, dy)
    // 来源(作者)
    ctx.font = `${sourceSize}px normal sans-serif`
    dx = (w - ctx.measureText(source).width) / 2
    dy = dy + sourceTop + titleSize
    ctx.fillText(source, dx, dy)
    // 内容
    dy = dy + sourceSize + sourceBottom
    dy = this.drawContent(
      ctx,
      info,
      w,
      h,
      dy,
      contentArr,
      font,
      fontSize,
      lineHeight
    )
    // slogan
    const txt = `分享自${this.slogan}快应用`
    const sloganSize = $utils.minFontSize(w)
    ctx.fillStyle = '#000000'
    ctx.globalAlpha = 0.3
    ctx.font = `${sloganSize}px normal sans-serif`
    dx = (w - ctx.measureText(txt).width) / 2
    ctx.fillText(txt, dx, this.height - cardBottom / 2)
  }
2. 工具栏
 #### 2-1. 模板
卡片模板,即分享内容
2-2. 图片(仅金句卡片支持)
布局不再赘述
实现切换图片,就要从卡片绘制方法入手,将图片地址,作为变量暴露出来,绘制方法在分享内容中drawCard,由父组件传递给卡片组件:
// 子组件 options
  choosePicHandler(item, idx) {
      this.localImage = false
      this.subCurrentItem.index = idx
      this.subCurrentItem.type = this.tabBarActive
      this.recentlyList = this.recentlyList.filter(ele => ele !== item)
      this.recentlyList.unshift(item)
      if (this.recentlyList.length > 10) this.recentlyList.pop()
      $utils.setStorage('recentlyPics', JSON.stringify(this.recentlyList)) // 通过storage进行存储
      this.$emit('draw', {
        currentImg: item,
        subCurrentItem: this.subCurrentItem
      })
  }
// 父组件 shareCard
  getNewCurrentImage(e) {
      if (!!e.detail.currentImg) {
        this.cardInfo.data.image = e.detail.currentImg
        switch (this.cardType) {
          case 0:
            this.$child('card').drawCard(this.idx, this.cardInfo)
            break
          case 1:
            this.$child('square').drawCard(this.cardInfo.data)
            break
          default:
            break
        }
        $utils.setStorage(
          'subCurrentItem',
          JSON.stringify(e.detail.subCurrentItem)
        )  // 通过storage进行存储
      }
   }
2-3. 排版
同样是需要什么就在drawCard中进行声明,将其暴露出来
// 行距、字体大小的增减
  plusAndMinusHandler(e) {
    let { type, num } = e.detail
    if (type === 'lineHeight') {
      const minLineHeight = $utils.setLineHeight(this.fontSize)
      const maxLineHeight = $utils.maxLineHeight(this.fontSize)
      if (this.lineHeight <= minLineHeight && num < 0) {
        this.lineHeight = minLineHeight
        return
      }
      if (this.lineHeight >= maxLineHeight && num > 0) {
        this.lineHeight = maxLineHeight
        return
      }
      this.lineHeight += num
    }
    if (type === 'fontSize') {
      const minFontSize = $utils.minFontSize(this.width)
      const maxFontSize = $utils.maxFontSize(this.width)
      if (this.fontSize <= minFontSize && num < 0) {
        this.fontSize = minFontSize
        return
      }
      if (this.fontSize >= maxFontSize && num > 0) {
        this.fontSize = maxFontSize
        return
      }
      let temp = this.lineHeight - this.fontSize
      this.fontSize += num
      this.lineHeight = temp + this.fontSize
    }
    if (this.cardType === 0) this.cardSizeHandler()
    this.drawNewCard()
  },
    // 文本对齐
  textAlignHandler(e) {
    if (this.cardType === 0) {
      this.alignTypeNormal = e.detail.type
    }
    if (this.cardType === 1) {
      this.alignTypeSquare = e.detail.type
    }
    this.drawNewCard()
  },
  //来源显隐
  sourceHandler(e) {
    let { title, author } = e.detail.data
    this.drawNewCard({ hasTitle: title, hasAuthor: author })
  },
    // 诗歌/诗词 配色方案
  schemeHandler(e) {
    let { color, bgcolor } = e.detail.scheme
    this.color = color
this.bgcolor = bgcolor
    this.drawNewCard()
  }
三、遇到的问题
1.日期绘制
今日美句,很大程度上,参考了原生应用《句读》;其首页卡片原需求的样式布局如下:
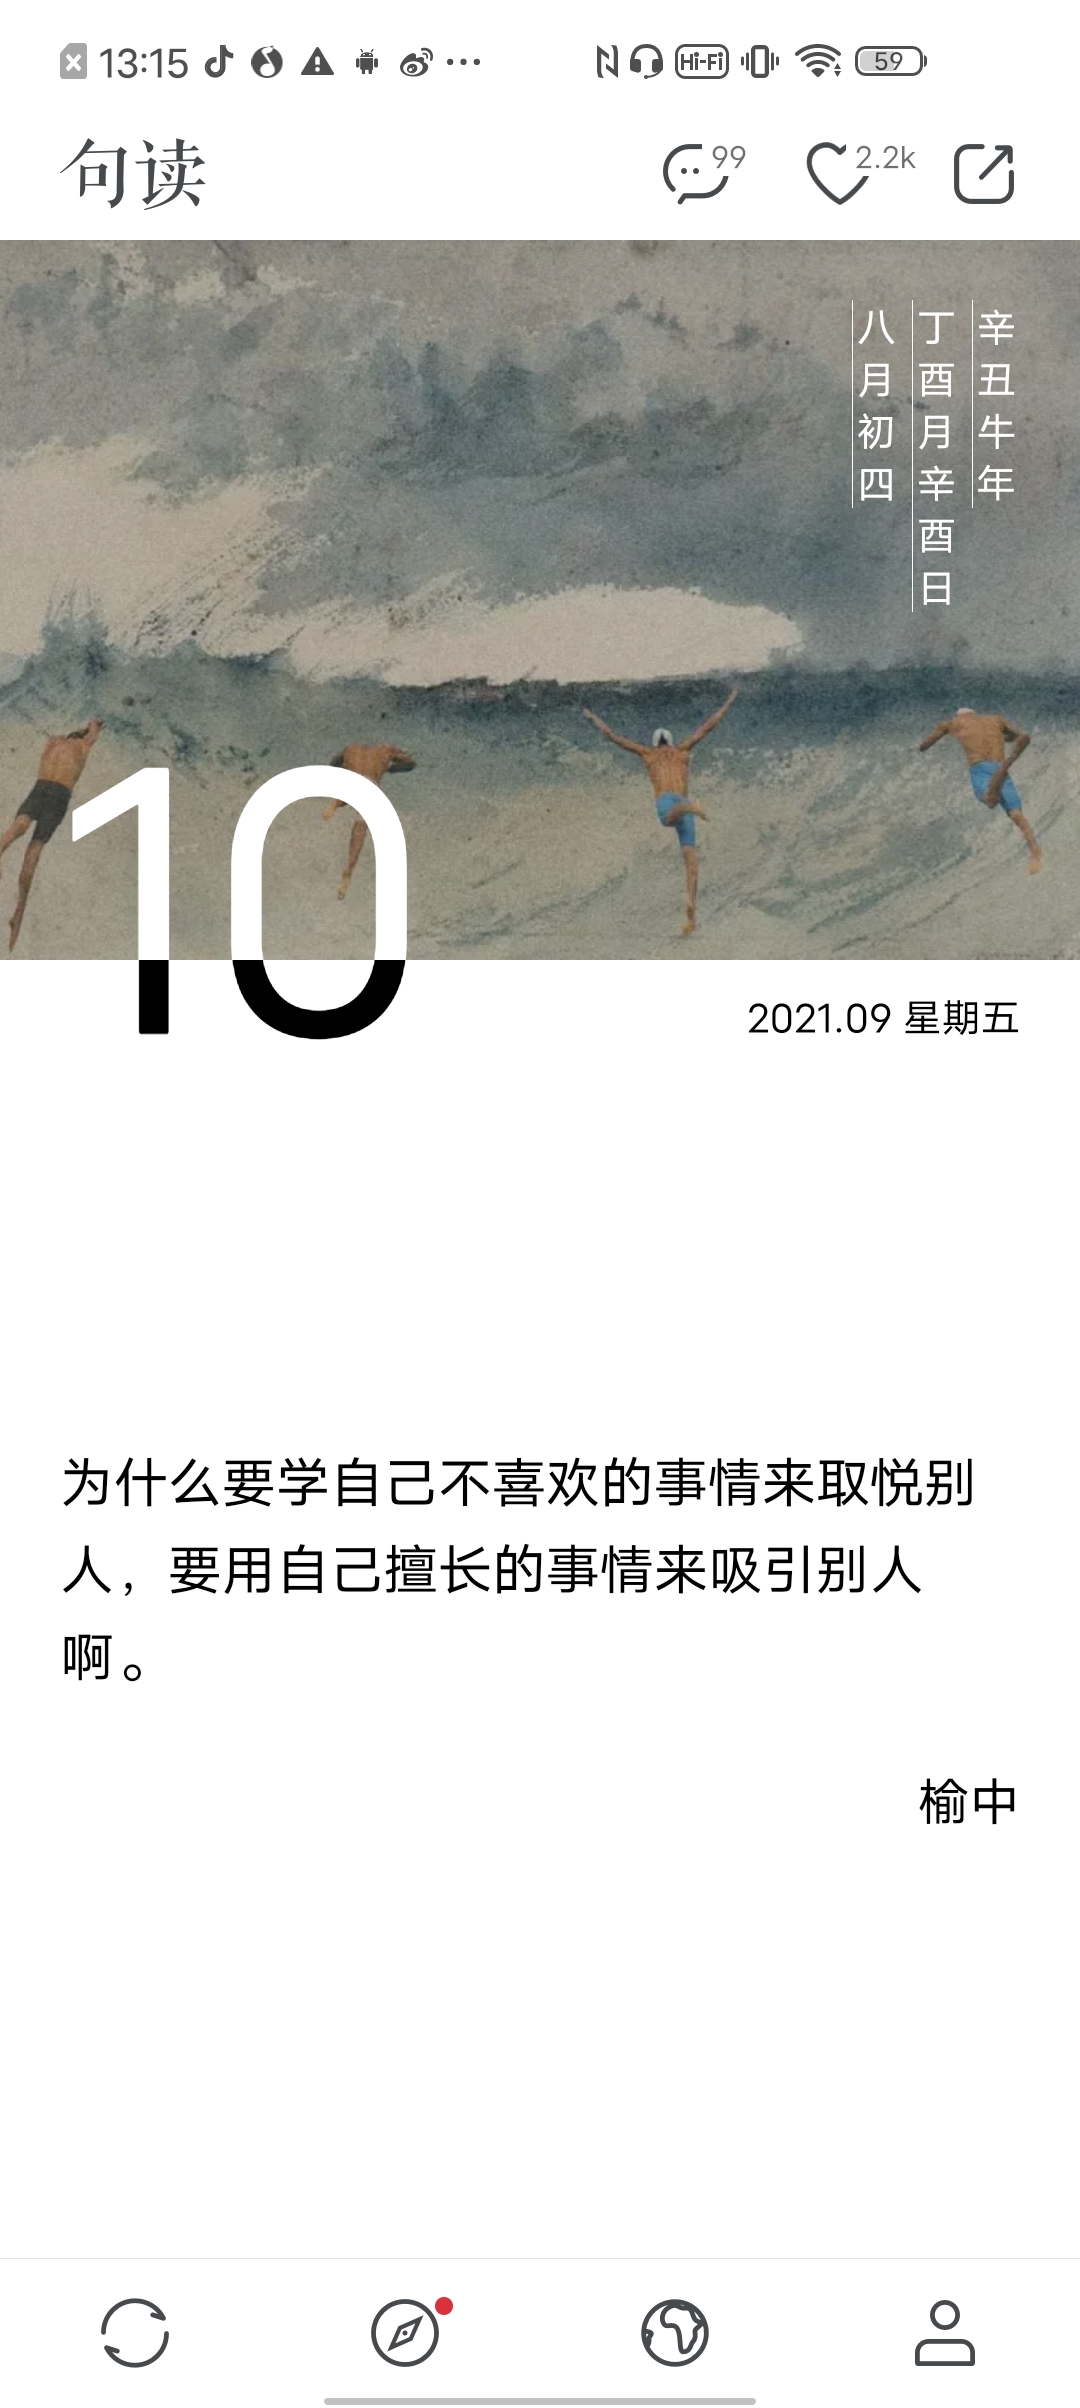 由于快应用 canvas 组件,图形和文字在使用
canvas.globalCompositeOperation 属性时,会有显示问题。因此将 10(即当日日期) 这部分绘制的内容,
直接文本填充:
let marginLeft = sw / 15;
ctx.font = `${fontSize}px bold sans-serif`;
ctx.fillStyle = "black";
后续引擎版本解决该 bug,可以使用下面代码实现原需求样式:
ctx.fillText(`${date}`, marginLeft, marginTop);
ctx.fillStyle = "white";
ctx.fillRect(0, sh - DATE_SIZE / 2, sw, DATE_SIZE / 2);
ctx.fillStyle = "black";
ctx.globalCompositeOperation = "destination-in";
2. 工具栏-字体
原需求如下:
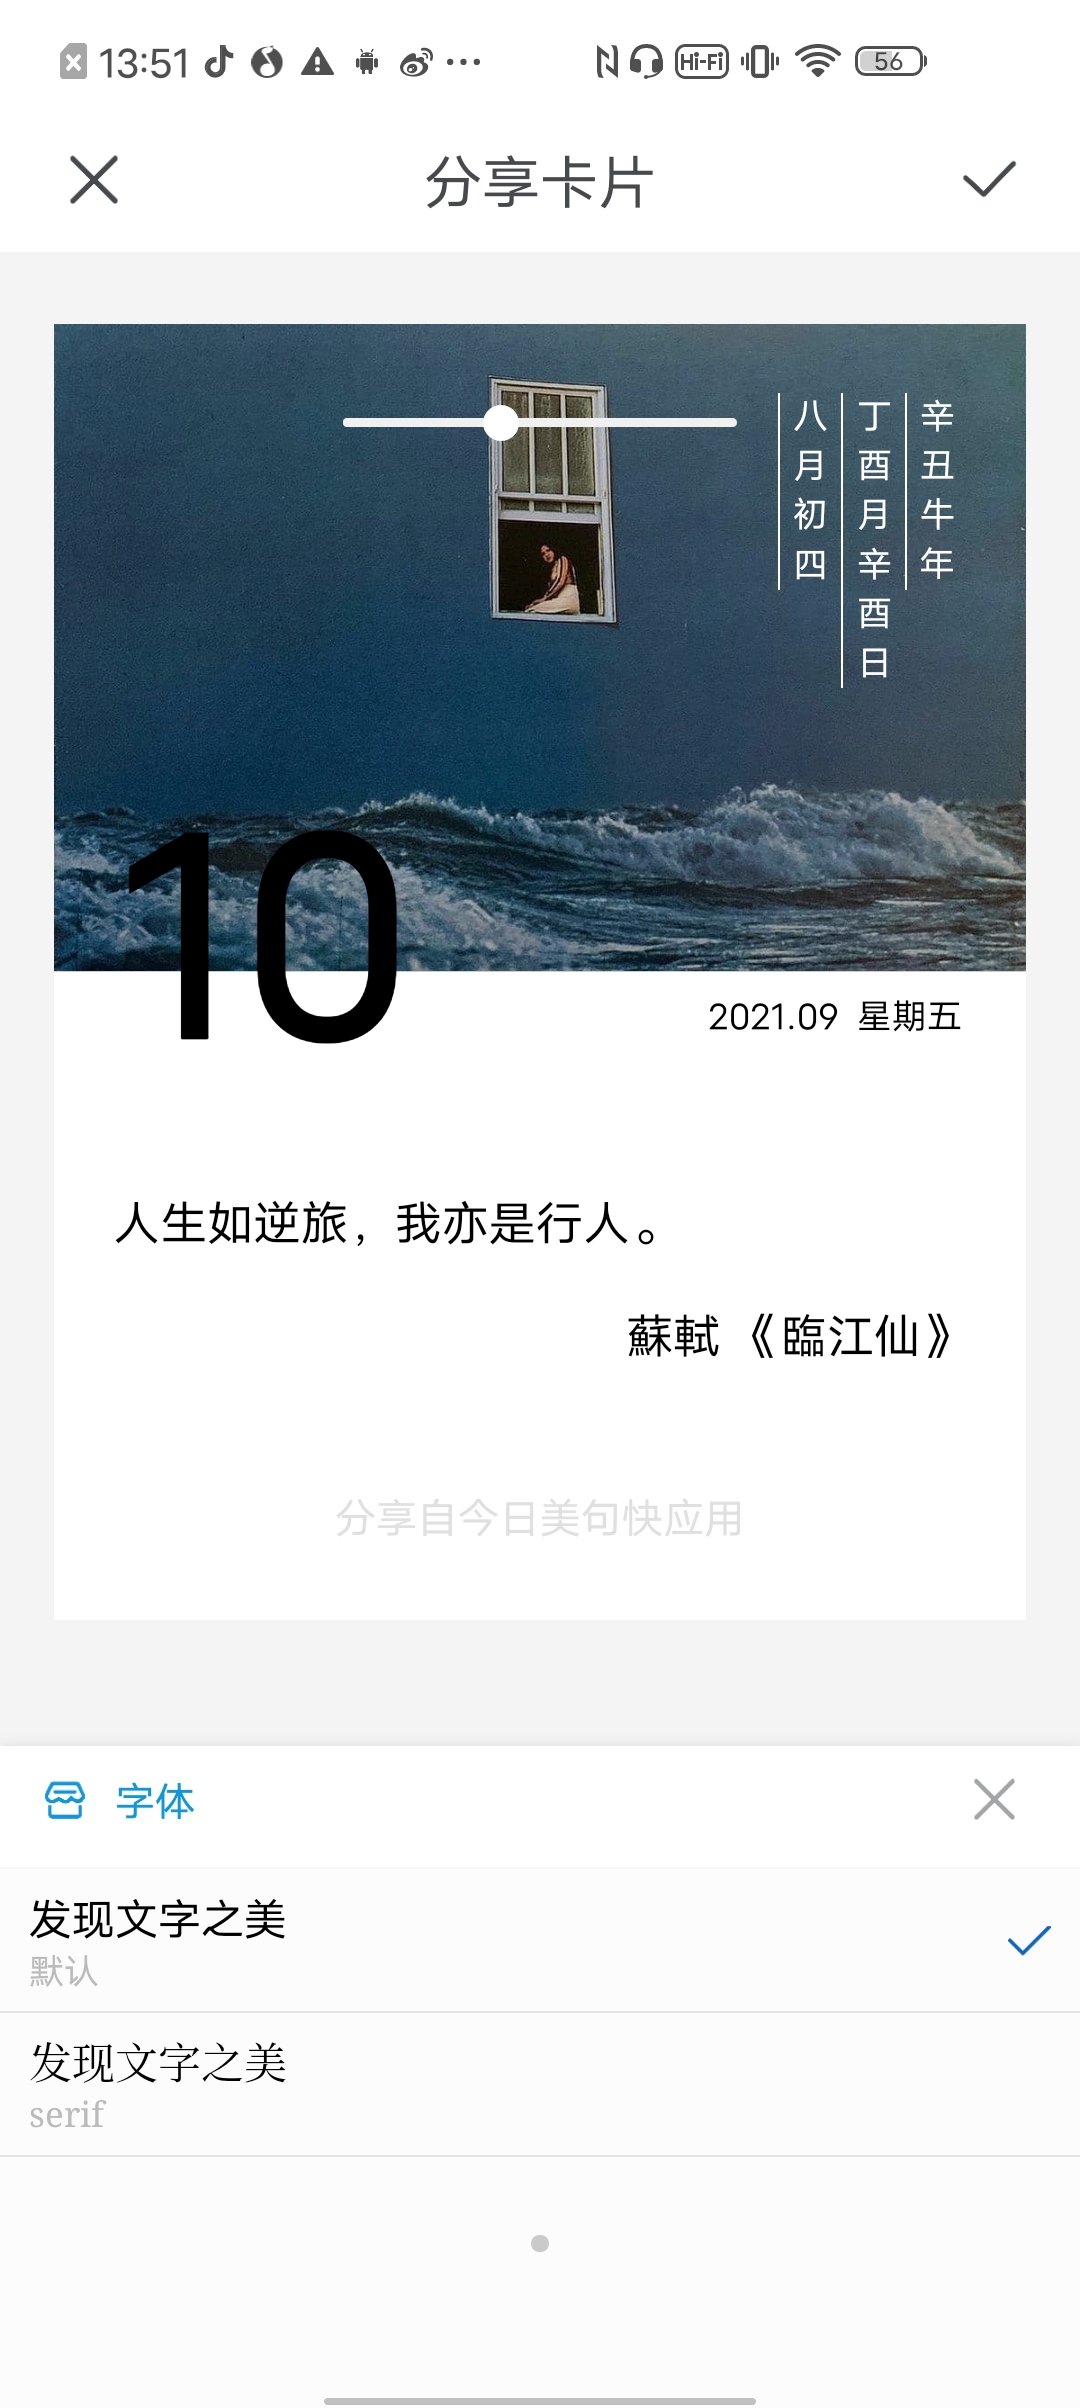
可以看到,快应用的 text 组件支持的一些字体样式,由于 canvas 组件开发时,未考虑到 ctx.font = 50px normal serif 这种写法,官网中给的写法默认是 ctx.font = 10px sans-serif,导致50px normal serif 这种三个样式的写法中最后一个样式 都不生效。
暂时只能注释该工具栏功能,待后续引擎版本修复后,可以将该部分代码开放使用。
const sentenceOpt = [
  {
    image: "../../assets/images/icon/template.png",
    type: "模板",
  },
  {
    image: "../../assets/images/icon/image.png",
    type: "图片",
  },
  // {
  //   image: '../../assets/images/icon/font.png',
  //   type: '字体'
  // },
  {
    image: "../../assets/images/icon/layout.png",
    type: "排版",
  },
];